Ready to dive in?
Start for free and launch your first project in minutes.
In the introduction, we outlined the overall workflow for generating synthetic datasets to train Physics-Informed ML models using the Inductiva API. Now, let’s dive into the very first step: defining the base case simulation model of the physical system we want to study.
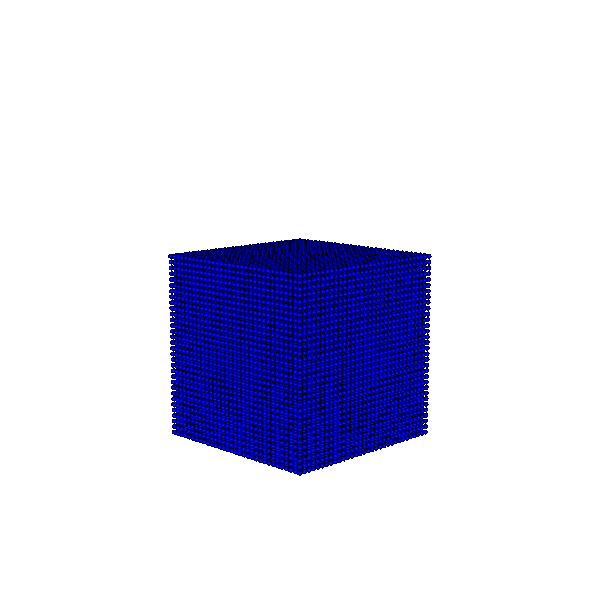
Our base case is simple: a 1-meter cube of water is initially positioned in the center of a sealed 2-meter cubic box. At the start of the simulation, the water block is released, causing it to fall, spill, and splash against the closed walls of the box over a 6-second interval. To model this scenario, we use the SPlisHSPlasH simulator.
To get started, we’ve prepared a directory containing all the configuration files needed to run the SPlisHSPlasH simulation.
Let’s begin by downloading the pre-configured input folder and saving it to a local directory. Inside this folder, you’ll find:
.obj file containing the 3D geometry of the fluid container — in this case, a simple cubic box..json file specifying the simulation parameters. This configuration file is organized into four key sections that define the simulation:
ConfigurationMaterialsRigidBodiesFluidBlocksUnderstanding the structure and contents of the configuration file is essential, as we’ll later modify it programmatically to generate multiple variations of our base case. This will allow us to create a diverse dataset suitable for training a Machine Learning model.
These parameters not only govern the physics of the simulation, but also have a significant impact on computational performance.
{
    "Configuration":
    {
        "stopAt": 6,
        "cameraPosition": [0,2,5],
        "cameraLookat": [0,0,0],
        "particleRadius": 0.015,
        "numberOfStepsPerRenderUpdate": 1,
        "density0": 1000,
        "simulationMethod": 4,
        "gravitation": [0,-9.81,0],
        "timeStepSize": 0.0001,
        "cflMethod": 1,
        "cflFactor": 0.05,
        "cflMaxTimeStepSize": 0.005,
        "stiffness": 50000,
        "exponent": 7,
        "enableVTKExport": true,
        "velocityUpdateMethod": 0,
        "enableDivergenceSolver": true,
        "boundaryHandlingMethod": 2
    },
    "Materials": [
        {
            "id": "Fluid",
            "viscosity": 0.01,
            "viscosityMethod": 1,
            "colorMapType": 1
        }
    ],
    "RigidBodies": [
        {
            "geometryFile": "unitBox.obj",
            "translation": [0,0,0],
            "rotationAxis": [1, 0, 0],
            "rotationAngle": 0,
            "scale": [2, 2, 2],
            "color": [0.1, 0.4, 0.6, 1.0],
            "isDynamic": false,
            "isWall": true,
            "mapInvert": true,
            "mapThickness": 0.0,
            "mapResolution": [25,25,25]
        }
    ],
    "FluidBlocks": [
        {
            "denseMode": 0,
            "start": [-0.5, -0.5, -0.5],
            "end": [0.5, 0.5, 0.5]
        }
    ]
}
To speed up the dataset generation process, we aim to avoid relying on high-performance, expensive machines to reduce runtime. Instead, our primary acceleration strategy is to leverage the ability to run a large number of machines in parallel.
For this reason, we focus on using instances that offer a strong cost-performance balance — such as the c2d cloud machine series.
To get started, the code below runs a single simulation of this base case using the Inductiva API. In this example, we're using
a c2d-highcpu-16 cloud machine, which is equipped with 16 virtual CPUs (vCPUs).
import inductiva

# Allocate cloud machine on Google Cloud Platform
cloud_machine = inductiva.resources.MachineGroup(
    provider="GCP",
    machine_type="c2d-highcpu-16",
    spot=True)

# Set path to the input directory with the SPlisHSPlasH files
input_dir = "/Path/to/splishsplash-base-dir"

# Initialize the Simulator
splishsplash = inductiva.simulators.SplishSplash()

# Run the simulation
task = splishsplash.run(
    input_dir=input_dir,
    sim_config_filename="config.json",
    on=cloud_machine)

# Wait for the simulation to finish and download the results
task.wait()
cloud_machine.terminate()

task.download_outputs()
This script uploads the input data from your local directory to the cloud and schedules a simulation task for execution. You'll
be able to view details about the task, such as its ID and the machine group assigned to it, by checking the terminal's standard
output (stdout):
■ Task Information:
    · ID:                    uaxaztw3o1y4mz45kv5diazf7
    · Simulator:             SplishSplash
    · Version:               2.13.0
    · Image:                 docker://inductiva/kutu:splishsplash_v2.13.0
    · Local input directory: splishsplash-base-dir
    · Submitting to the following computational resources:
        · Machine Group api-mmirpn1frhnmm9ja2a2owftqu with c2d-highcpu-16 machines
    · Restart On Preemption: False


■ Task uaxaztw3o1y4mz45kv5diazf7 submitted to the queue of the Machine Group api-mmirpn1frhnmm9ja2a2owftqu with c2d-highcpu-16 machines.
The simulation should take approximately 3 minutes to complete. Once finished, the resulting data will be
stored in a directory located at inductiva-output/{task-id}. This output includes several log files -
most notably stderr.txt, stdout.txt, and log/SPH_log.txt - which provide details about the simulation
process and report any errors that may have occurred.
More importantly, the output directory contains a vtk subdirectory, where a series of .vtk files store data
about the fluid particles at each simulation timestep. These .vtk files are the seeds of our dataset.