Inductiva runs the simulations, so you can run the science.
Rendering the Mesh in Blender
Once you’ve generated your .obj files, importing them into Blender is straightforward: just drag and drop them into the scene. This creates one object per animation frame, resulting in many .obj files appearing simultaneously. While this isn’t Blender’s typical animation workflow, it works fine with some scene setup.
Note: When you open Blender, feel free to delete the default cube from the Scene Collection.
1. Set the Render Engine and Material
Since we'll be using ray tracing, start by switching the render engine to Cycles:
- Go to the Render tab in the Properties panel.
- Set Render Engine to
Cycles. - Set Device to
GPU Compute(if available).
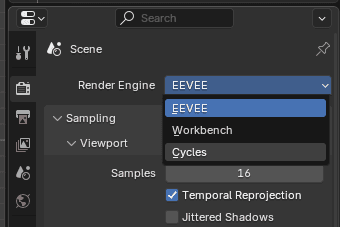
Figure 1: Select Cycles for renderer
Next, assign a material to your objects:
- Select the first object in the scene (e.g.,
PartFluid_0000). - In the Material tab of the Properties panel, click New to create a material and rename it (e.g., Water).
- Set the material properties:
- Base Color: Light blue
- Roughness:
0.1 - IOR (Index of Refraction):
1.33 - Transmission:
1.0(for full transparency)
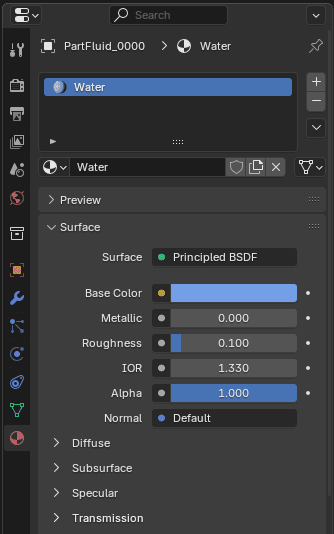
Figure 2: Creating the material
To apply this material to all .obj objects:
- Select
PartFluid_0000, then Shift-click to select the last object (e.g.,PartFluid_0200) to select all. - Press
Ctrl + Land choose Link Materials.
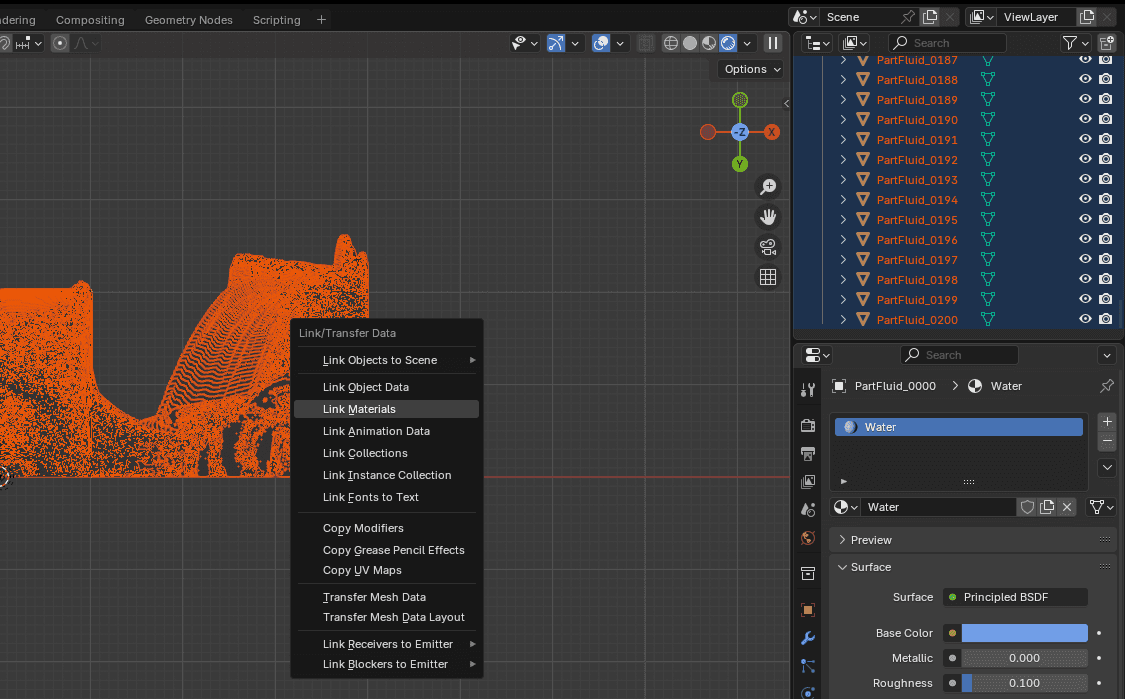
Figure 3: Linking the material across objects
Now all fluid objects share the same water material. To preview the effect, change the viewport shading (top-right corner) to Material Preview.

Figure 4: Switching to Material Preview
2. Position the Camera
Set up the camera as follows:
- Select the camera in the Scene Collection.
- In the Object tab of the Properties panel, set:
- Location:
X: 200,Y: -120,Z: 650 - Rotation:
X: 0.0,Y: 0.0,Z: 180.0
- Location:
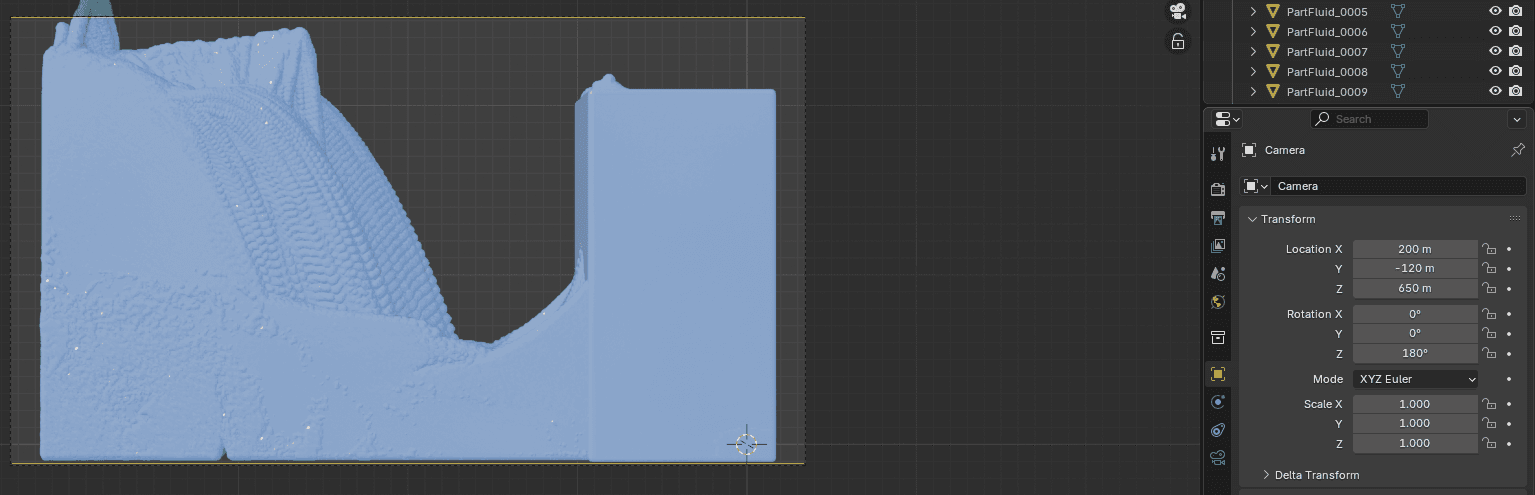
Figure 5: Camera positioning
Additionally, in the Camera Data tab, set the End value of the lens to 1000.

Figure 6: Set camera End
3. Set Up the Animation
Since each frame is imported as a separate object, all objects are visible simultaneously by default. To display only the relevant object for each frame, follow these instructions:
- Go to the Scripting workspace (top bar).
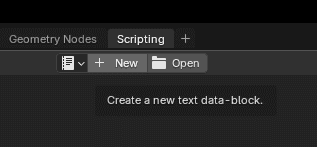
Figure 7: Create a blender script
- Create a new script and paste the following:
import bpy
import re

# Helper function to extract the number from the object name
def extract_number(obj):
    match = re.search(r'\d+', obj.name)
    return int(match.group()) if match else -1

# Select all fluid mesh objects
imported_objs = [obj for obj in bpy.data.objects if obj.type == 'MESH' and obj.name.startswith("PartFluid")]
imported_objs.sort(key=extract_number)

# Hide all objects initially
for obj in imported_objs:
    obj.hide_viewport = True
    obj.hide_render = True
    obj.keyframe_insert(data_path="hide_viewport", frame=1)
    obj.keyframe_insert(data_path="hide_render", frame=1)

# Animate: show one object per frame
for i, obj in enumerate(imported_objs):
    frame = i + 1

    obj.hide_viewport = False
    obj.hide_render = False
    obj.keyframe_insert(data_path="hide_viewport", frame=frame)
    obj.keyframe_insert(data_path="hide_render", frame=frame)

    obj.hide_viewport = True
    obj.hide_render = True
    obj.keyframe_insert(data_path="hide_viewport", frame=frame + 1)
    obj.keyframe_insert(data_path="hide_render", frame=frame + 1)
This script:
- Hides all objects by default.
- Animates them so only one object is visible per frame.
4. Render the Animation
To export the animation:
- Go to the Output tab in the Properties panel.
- Set:
- Output directory
- File format
- End Frame to
200
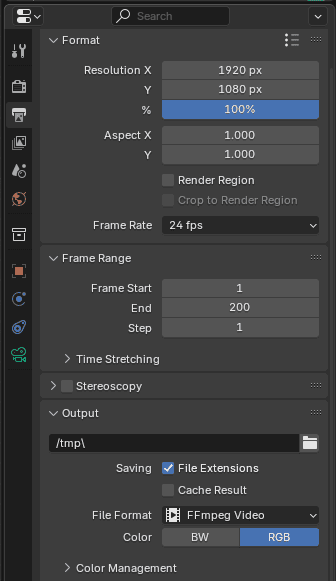
Figure 8: Set the Blender output
Finally, go to the top menu and select Render > Render Animation. Blender will render each frame using ray tracing, which may take some time depending on your hardware.
Wrapping Up
There’s more to explore, like adding an HDRI environment to enhance lighting and realism, but we'll save that for another tutorial. For now, feel free to adjust the material and camera settings to get the visual effect you want.
Happy rendering!